
Changing the brake pads on a 2014 Toyota Tundra is a manageable DIY job only when you use the correct parts, safe lifting points, and the Toyota procedure for your truck’s exact brake package. The front and rear assemblies use different hardware, and a pad-only service does not always require rotor or caliper removal.
Last updated: July 14, 2026
Quick Answer
To change the pads safely, confirm the correct parts, lift and support the Tundra, remove one axle’s wheels, document the original hardware, retract the pistons evenly, install pads and shims without contaminating friction surfaces, torque every removed fastener to the correct specification, pump the pedal until firm, inspect for leaks, and complete a cautious road test.
Key Takeaways
- Confirm pad, rotor, shim, and hardware fitment by VIN before lifting the truck.
- Never work under a Tundra supported only by a hydraulic jack.
- Do not assume front and rear calipers use the same removal or piston-retraction method.
- Keep grease, paint, brake fluid, and cleaner residue off pad friction material and rotor faces.
- Use Toyota’s repair information for torque values and follow the pad manufacturer’s bedding instructions.
- Do not drive until the pedal is firm and the system passes a parked leak and function check.
At a Glance
| Time Required | About 2–4 hours for front and rear pads; allow more time for corrosion, rotor service, seized hardware, or optional painting |
| Difficulty | Moderate; stop if parts do not match, a piston will not retract, a hose is damaged, fluid leaks, or the pedal remains soft |
| Tools Needed | Wheel chocks, rated floor jack and stands, lug socket, hand tools, calibrated torque wrench, piston spreader, wire brush, brake cleaner, drain-free catch materials, and a caliper support hook |
| Parts and Supplies | Correct axle-set pads, required shims or clips, brake-compatible lubricant, brake cleaner, and rotors or parking-brake hardware only if inspection shows they are needed |
| Cost | Varies by pad compound, hardware condition, and whether rotors, calipers, hoses, or parking-brake parts also require service |
Warning: Brakes are safety-critical. Do not drive if you find a fluid leak, damaged hose, cracked rotor, seized piston, missing hardware, badly corroded line, loose fastener, abnormal wheel drag, or a low, sinking, or spongy pedal after reassembly.
Safety Gear, Correct Parts, and Service Information
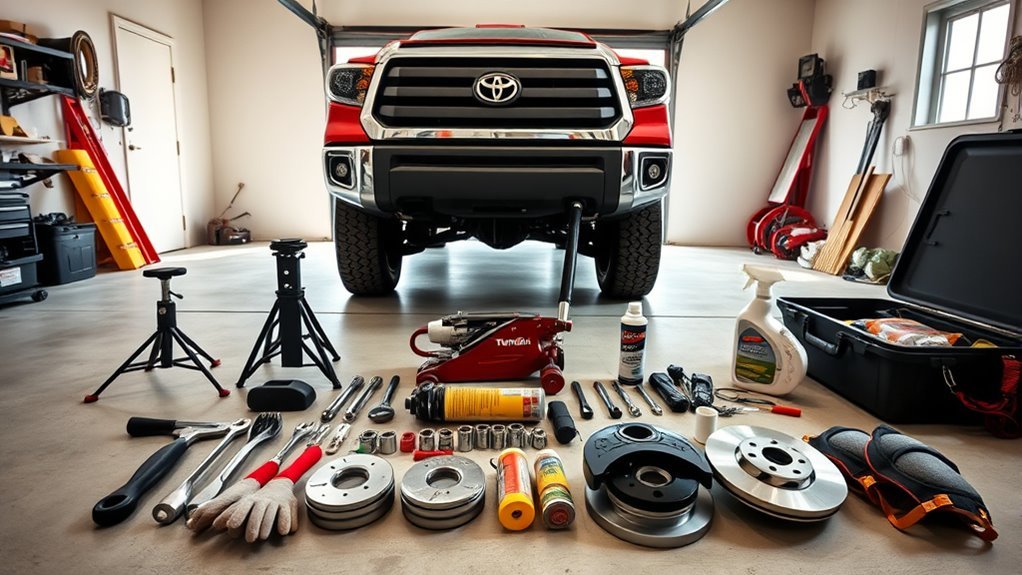
A safe brake job starts before the truck leaves the ground. Work on a flat, hard surface with good lighting and ventilation. Wear eye protection and chemical-resistant gloves, keep children and pets away, and have a plan for containing used cleaner, dirty wipes, and any removed fluid.
Confirm your VIN, wheel size, trim, and brake package before buying parts. Toyota’s manuals and warranties portal provides owner information, while the Toyota Technical Information System is the factory source for repair procedures, service limits, diagrams, and torque specifications. Compare every new pad, shim, clip, and wear indicator with the removed part before installation.
Use Toyota Genuine parts or a reputable OEM-equivalent axle set made for your exact configuration. A low-dust brake pad may help keep wheels cleaner, but fitment, temperature range, braking consistency, and intended use matter more than a low-dust claim.
Gather wheel chocks, a correctly rated floor jack, rated jack stands, a lug socket, ratchet and sockets, breaker bar, calibrated torque wrench, piston-spreading tool, caliper hook or strong wire, nylon or wire brush, lint-free wipes, and brake parts cleaner. Keep brake-compatible high-temperature lubricant available for the contact points specified by the pad or vehicle procedure.
Do not use compressed air to blow dust from old brake parts. Federal workplace rules for automotive brake service specify controlled methods such as HEPA vacuum or low-pressure wet cleaning where asbestos exposure may be possible. For a home job, keep dust damp or captured, avoid dry brushing that creates airborne dust, and follow the cleaner label and local disposal rules.
Pro Tip: Photograph each brake assembly before removing hardware. Capture pad orientation, wear-indicator position, shim layers, retaining springs, clips, hose routing, and the location of every fastener you plan to remove.
Lifting the Tundra and Removing the Wheels
Place the transmission in Park and switch off the engine. Chock the wheels that will remain on the ground. Set the parking brake while servicing the front brakes, but release it before rear rotor removal because the parking-brake shoes operate inside the rear rotor hat.
Break the lug nuts loose about one turn while the tire still touches the ground. Position the jack only at a lift point identified for your Tundra, raise the vehicle, and place correctly rated stands at the specified support points. Lower the truck onto the stands and leave the jack positioned as a secondary support without relying on it.
Push the body gently from a safe standing position. If the truck shifts, creaks, or feels unstable, lower it and reset the supports. Remove the lug nuts and wheels, then place the wheels flat away from the work area.
Keep lug nuts and removed fasteners organized by position. Do not coat wheel studs or lug seats with grease or anti-seize unless the wheel or vehicle manufacturer specifically instructs it, because lubrication changes the clamping force produced by a given torque.
Warning: Never place any part of your body under a vehicle that is supported only by a jack. If the ground is soft, sloped, cracked, or wet enough to let a stand move, choose another work area.
Optional: Cleaning Wheel Wells and Preparing for Paint
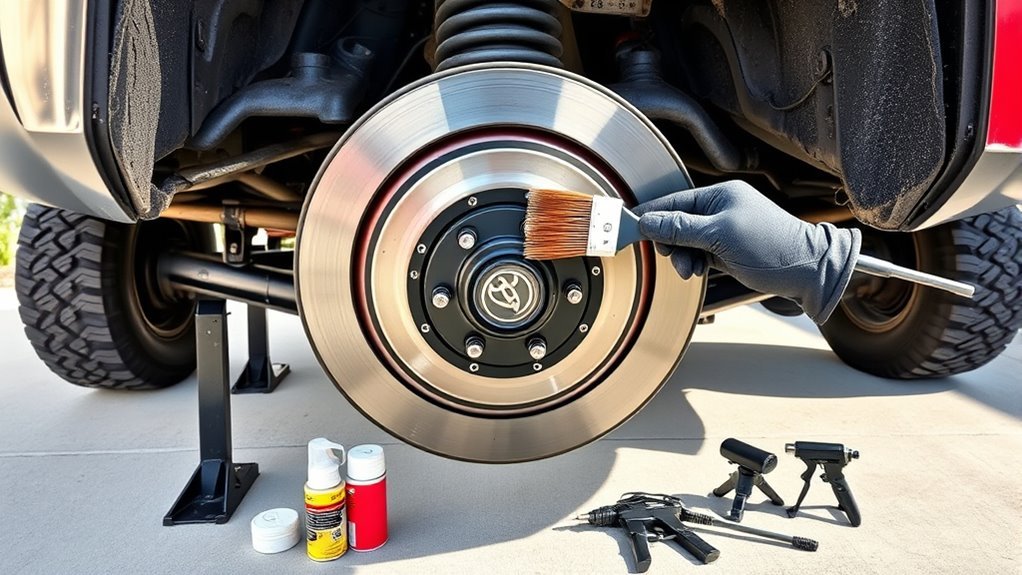
Wheel-well cleaning and painting are optional appearance jobs, not required steps in a pad replacement. Complete the mechanical inspection first, and do not let cosmetic work distract from damaged hoses, leaking components, worn rotors, seized hardware, or incorrect parts.
Remove loose mud and flaky corrosion with controlled hand brushing. Avoid directing dry dust toward your face, clothing, or the open brake assembly. Use a cleaner that is suitable for the surface and follow its safety data and label instructions. Let cleaned areas dry fully before masking or painting.
Mask the rotor faces, pads, caliper piston boots, rubber hoses, bleeder screws, wheel studs, hub and wheel mating faces, suspension joints, body panels, and tire sidewalls. Coating on any friction, sealing, threaded, or clamping surface can cause unsafe operation or inaccurate torque.
Inspect the wheel well after cleaning. Heavy scale, perforation, damaged brake-line coating, wetness around a hose or caliper, and fresh fluid tracks need mechanical attention rather than paint.
Optional: Painting Calipers and Wheel-Well Components
Use only a coating intended for the temperature and material involved. Work in a ventilated area away from flames, sparks, hot lamps, heaters, and ignition sources. Wear the protective equipment listed by the coating manufacturer.
Clean only the exterior surfaces to be painted and mask the brake assembly carefully. Never paint pad friction material, rotor faces, retaining pins, slide-pin working surfaces, piston boots, hose fittings, bleeder screws, bolt threads, wheel studs, or wheel-to-hub mounting surfaces.
Keep cosmetic work separate from the friction surfaces. A clean finish never compensates for contaminated pads, a loose fastener, a damaged hose, or an unsafe pedal.
Apply the number and thickness of coats specified on the product label rather than assuming every paint requires two coats. Observe the stated flash, handling, and full-cure times. Do not reinstall contaminated pads or drive the truck before the coating has cured enough to withstand assembly and brake heat.
Note: Aerosol brake cleaner and paint can produce harmful vapor and may damage some plastics, rubber, finishes, or coatings. Follow each product label, protect nearby surfaces, and never mix chemicals in an unmarked container.
Front Brake Pad Removal and Inspection
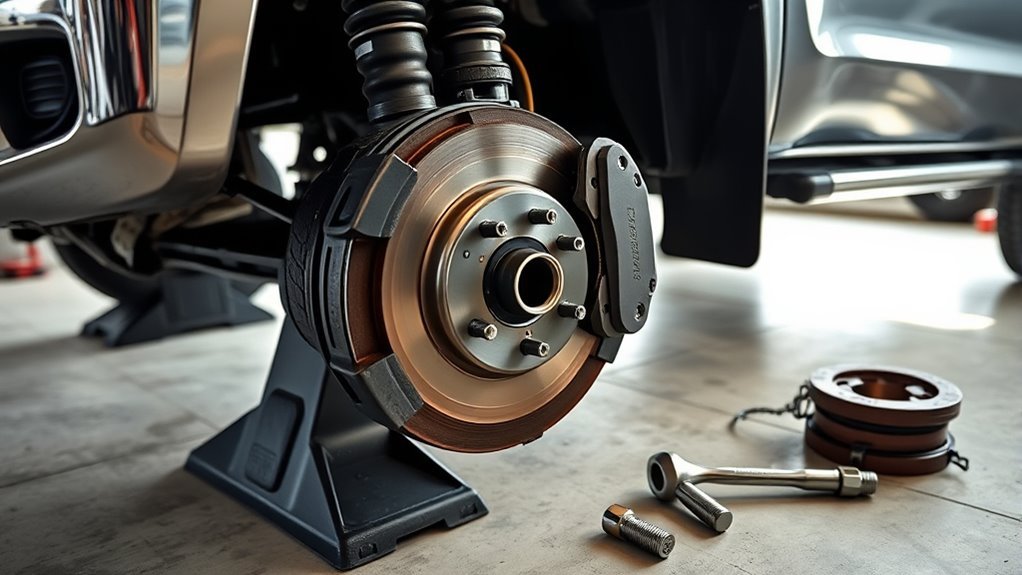
Identify the front caliper and retaining hardware before removing anything. A generic instruction to remove “slide bolts” does not fit every Tundra front brake assembly. Many configurations use a fixed multi-piston caliper with pad-retaining pins and an anti-rattle spring, so pad-only service may not require removing the caliper or rotor. Use the VIN-specific Toyota procedure for your truck.
Protecting the Brake Hose and Line
Do not disconnect the hydraulic hose for a routine pad replacement. Do not pry a hard line, bend a hose sharply, or remove a line-support clip unless the factory procedure requires it for the work being performed.
If rotor service requires caliper removal, break the correct caliper mounting fasteners loose while supporting the caliper. Lift the caliper away without twisting the hose, then hang it from a strong suspension point with a caliper hook or wire. The hose must not carry the caliper’s weight.
Removing Front Pads and Retaining Hardware
Record the position of the anti-rattle spring, pad-retaining pins, clips, shims, and wear indicators. Remove only the hardware specified for pad removal. Keep left- and right-side parts separate so you can compare wear patterns and return directional hardware to the correct position.
| Check | What It Tells You |
|---|---|
| Inner versus outer pad thickness | A large difference may indicate piston, caliper, hardware, or alignment trouble |
| Tapered wear | May point to binding hardware, uneven piston action, or caliper misalignment |
| Cracks, crumbling, oil, or brake fluid | The contamination or component fault must be corrected before new pads are installed |
Never let a removed caliper hang by its hose. If the hose is cracked, swollen, kinked, chafed, wet, or pulled tight at full steering lock, stop and replace or repair the damaged component before driving.
Inspecting the Rotor, Hub, and Contact Surfaces
Rotor removal is not automatically required for a pad-only job. Inspect each rotor for cracks, deep scoring, heavy corrosion on the swept area, blue heat spots, an excessive outer lip, or signs of uneven deposits. Measure thickness at several points with a micrometer and compare the lowest reading with the minimum thickness marked on the rotor or listed in Toyota service information.
If the rotor must come off, remove the caliper and any bracket or mounting parts in the exact order specified by the repair manual. Use the rotor’s threaded removal holes when provided, tightening the correct bolts evenly. Do not pry against the dust shield or strike a friction surface hard enough to damage the rotor or hub.
Clean new or reusable rotor faces with brake cleaner and a lint-free wipe. Clean rust and debris from the hub face so the rotor seats flat. Contamination or scale trapped between the hub and rotor can contribute to runout, vibration, and uneven pad contact.
Pro Tip: If one pad is worn much more than its partner, do not treat the job as a simple pad swap. Find the cause, such as a sticking piston, damaged boot, corroded hardware, or rotor problem, before installing the new set.
Installing New Front Brake Pads and Hardware
Clean the master-cylinder reservoir cap and check the fluid level before retracting the pistons. Leave the reservoir protected from dirt. If the level is already near MAX, remove only enough fluid with a clean, brake-fluid-safe tool to prevent overflow, and dispose of it properly. Never reuse removed fluid.
Use the old pads and a suitable piston spreader to retract opposing pistons slowly and evenly. Watch the reservoir throughout the process. Do not clamp directly onto a piston or boot. If one piston will not move smoothly, another piston pushes outward unexpectedly, or fluid leaks, stop and repair the fault.
Clean the caliper’s pad-contact areas and reusable retaining hardware without creating airborne dust. Replace bent, heavily corroded, loose, heat-damaged, or manufacturer-designated one-time-use hardware. Verify that the new pads match the old pads in shape, thickness, slotting, and wear-indicator location.
Install shims, clips, pins, and the anti-rattle spring in the documented orientation. Apply only a thin film of brake-compatible lubricant to the metal contact points identified by the pad or Toyota procedure. Never place lubricant on rotor faces, pad friction material, rubber boots, or any surface not approved for grease.
Reinstall every removed caliper or bracket fastener and tighten it with a calibrated torque wrench to the correct specification for the exact brake package. If a bolt cross-threads, spins, feels stretched, has damaged threads, or will not reach specification normally, replace or repair the affected parts before continuing.
Servicing Rear Calipers, Rotors, and the Parking-Brake Drum
Chock the front wheels and release the parking brake before working on the rear rotors. The rear service brake uses a disc, while the parking-brake shoes operate inside the rotor hat. Parking-brake tension can hold the rotor even after the caliper is removed.
Remove the rear caliper fastener or fasteners specified by the Toyota procedure, then support the caliper so the hose stays relaxed and untwisted. Remove the pads and note the position of clips, shims, and wear indicators. Inspect both slide pins and their boots where the assembly uses sliding hardware.
Clean and inspect the slide pins. A pin should move smoothly without pitting, heavy corrosion, torn boots, or hardened lubricant. Apply only the lubricant type and amount approved for the pin and rubber materials. Replace damaged boots or pins rather than hiding corrosion under fresh grease.
Remove the rear rotor only when inspection, measurement, replacement, or parking-brake service requires it. If it sticks, confirm the parking brake is fully released. Use the rotor’s service holes or the parking-brake adjustment procedure specified by Toyota instead of aggressive prying or uncontrolled hammering.
Inspect the parking-brake shoes, springs, hold-downs, adjuster, and drum surface for loose parts, heat damage, heavy rust, broken lining, contamination, or evidence of dragging. Correct those problems before reinstalling the rotor.
Warning: Do not blow out the rear parking-brake drum with compressed air. Use controlled wet cleaning or an appropriate HEPA capture method so brake dust does not become airborne.
Installing New Rear Brake Pads and Checking for Drag
Compare the new rear pads and hardware with the removed parts. Correct any rotor, caliper, hose, parking-brake, or slide-pin problem before fitting the pads. Replace pads as a complete axle set so both rear wheels use the same friction material and new-pad thickness.
Retract the rear piston slowly with the correct tool for the caliper design while monitoring the reservoir. Keep the piston boot from twisting or pinching. If the piston binds, leaks, or will not retract normally, the caliper needs service or replacement.
| Step | Action | Safety Check |
|---|---|---|
| Pad fit | Seat pads fully in clean clips and abutments | Pads move as intended without binding |
| Shims and indicators | Install in the documented or specified orientation | No hardware touches the rotor incorrectly |
| Lubrication | Use a thin film only at approved metal contact points | Friction surfaces remain completely dry and clean |
| Caliper installation | Route the hose naturally and torque removed fasteners to specification | Hose is not twisted, stretched, or rubbing |
Turn the rotor by hand after assembly. Light pad contact can be normal, but the rotor should not lock, stop abruptly, scrape on misplaced hardware, or show much more drag on one side than the other. Investigate abnormal resistance before installing the wheel.
Rear Pad Installation Steps
- Verify the parking brake is released and the rotor and parking-brake hardware are correctly installed.
- Confirm the new pad shape, thickness, shims, clips, and wear indicators match the application.
- Clean the bracket and approved contact areas without contaminating the rotor or pads.
- Retract the piston slowly, install the pads and hardware, and confirm free movement where required.
- Reinstall the caliper, torque removed fasteners to the exact specification, and check hose routing.
- Rotate the rotor by hand and compare drag with the opposite side.
Finishing Optional Paint Work
If you are painting the calipers, finish only after the pad and rotor installation has passed its mechanical checks. Mask the rotor, pads, rubber parts, bleeder, hose fittings, threads, and mounting surfaces. Use cardboard or a purpose-made shield to control overspray.
Apply and cure the coating exactly as its manufacturer directs. Remove masking carefully, inspect for overspray, and clean any contaminated nonporous surface with a suitable product. Replace friction material if paint, grease, or brake fluid has soaked into it.
Recheck caliper fasteners, retaining hardware, hose routing, rotor movement, and the surrounding area for leaks before the wheels go back on.
Reassembly, Torque Specifications, and Brake-Pedal Setup
Clean the wheel and hub mating faces without removing sound material or damaging the finish. Install the wheels and hand-start every lug nut. Tighten them in a crisscross pattern in stages, then use a calibrated torque wrench and the specification for the exact wheel and vehicle setup.
Confirm every removed caliper, bracket, retaining, and wheel fastener has been installed and torqued. Check that hoses are not twisted, clips are secure, bleeder screws are dry, slide-pin boots are seated, and no tool or masking material remains in a wheel well.
Before moving the truck, pump the brake pedal slowly until it becomes firm and the travel stabilizes. This moves the retracted pistons back toward the pads. Check the reservoir and keep the fluid between its marked limits using only the type specified for the vehicle. Do not overfill.
Start the engine and press the pedal again. Power assist may let the pedal move slightly farther, but it should feel consistent and should not continue sinking under steady pressure. Inspect all four serviced corners and the master-cylinder area for leaks.
The truck is not ready to move until the brake pedal is firm, every fastener is accounted for, each hose is routed safely, and a parked leak inspection is clean.
Warning: A low, sinking, or spongy pedal is not a normal “break-in” condition. Do not road test the truck until the cause has been diagnosed and corrected.
Road Test, Bedding, Troubleshooting, and Maintenance
Safe Post-Install Inspection
Begin in a clear, level area away from traffic. Verify normal pedal feel while stationary, then move at walking speed and apply the brakes gently. Confirm the truck stops smoothly and the pedal remains firm. Increase speed gradually only after the first checks pass.
During the initial test, listen and feel for grinding, heavy scraping, clunks, pulling, steering shake, pedal pulsation, smoke, strong burning odor, or a wheel that becomes much hotter than its partner. Stop immediately if any symptom suggests loose hardware, contamination, dragging, a rotor problem, or hydraulic trouble.
Bedding In the New Pads
Use the bedding or burnishing procedure supplied with the exact pads and rotors. Procedures vary by friction compound and rotor type. For example, PowerStop publishes product-specific break-in sequences, but those instructions should not be copied automatically to pads from another manufacturer.
Choose a safe, legal, low-traffic location and allow enough distance for controlled stops and cooling. Do not hold the pedal firmly at a complete stop while the brakes are extremely hot unless the product instructions require it. If the manufacturer provides no bedding procedure, contact the pad maker or use the conservative guidance included with the parts rather than inventing a speed-and-stop count.
Troubleshooting After Installation
| Symptom | Possible Causes | Response |
|---|---|---|
| Soft or sinking pedal | Leak, air in an opened hydraulic circuit, master-cylinder problem, or incomplete piston seating | Do not drive; inspect and repair, then bleed only when the hydraulic system requires it |
| Pulling to one side | Sticking piston or slide, contamination, unequal friction, hose restriction, or tire issue | Stop the test and compare both sides before further driving |
| Grinding or hard scraping | Misinstalled hardware, backing plate contact, missing friction material, or rotor damage | Stop immediately and disassemble for inspection |
| One wheel runs very hot | Binding pad, seized caliper, restricted hose, parking-brake drag, or incorrect hardware | Let it cool safely and correct the cause before driving |
| Pedal pulsation or steering shake | Rotor runout, thickness variation, uneven deposits, hub contamination, or wheel-torque problem | Measure and inspect rather than assuming the rotor is “warped” |
Ongoing Brake Maintenance
Inspect pads, rotors, calipers, hoses, and hardware at the maintenance intervals and under the conditions listed for your Tundra. Use the service limit for the exact pad and rotor application rather than a universal replacement thickness. Uneven wear is as important as remaining thickness.
Check brake-fluid level when performing routine under-hood inspections and investigate a falling level instead of repeatedly topping it off. Follow Toyota’s maintenance information and fluid specification. A universal two- or three-year flush interval should not replace vehicle-specific guidance, testing, service history, or local operating conditions.
Towing, heavy payloads, mountain driving, frequent stop-and-go use, mud, water crossings, road salt, and off-road dust can increase heat, corrosion, and wear. Inspect the system more often under severe use, and address noise, pulling, vibration, leaks, or changed pedal feel promptly.
Frequently Asked Questions
Can I upgrade to larger rotors or a big-brake kit on a 2014 Tundra?
Yes, but the kit must match your exact truck and wheels. Verify wheel clearance, caliper brackets, rotor offset, hose routing, master-cylinder compatibility, brake balance, spare-wheel clearance, and any effect on stability-control operation. Follow the kit maker’s installation, torque, bleeding, and bedding instructions.
How do towing and heavy loads affect brake-pad choice and lifespan?
Towing and heavy payloads create more heat and can shorten pad and rotor life. Choose a pad explicitly rated for the truck’s use, keep the factory brake balance intact, inspect more often, use trailer brakes when required, and allow more stopping distance. Do not choose a compound only because it is labeled ceramic or semi-metallic.
What symptoms suggest a rotor problem rather than normal pad wear?
Pedal pulsation, steering shake during braking, repeatable vibration, deep scoring, cracks, heavy heat spotting, or thickness below the marked minimum suggests a rotor or mounting problem. Normal pad wear usually appears as reduced friction thickness. Measure rotor thickness and runout instead of relying on appearance or the word “warped.”
Are ceramic or semi-metallic pads better for off-road driving and towing?
Neither material label guarantees the best result. Compare the pad maker’s intended use, operating-temperature range, cold response, fade resistance, noise, dust, rotor wear, and fitment. A truck-specific heavy-duty compound can be a better choice than a generic pad of either category.
How often should I flush or bleed brake fluid on a 2014 Tundra?
Bleeding is required when air enters the hydraulic system or when a hydraulic component is opened or replaced. Fluid replacement should follow Toyota guidance, service history, fluid condition, and operating environment. Use only the specified fluid from a sealed container and do not rely on a universal two- or three-year interval.
Do I need to replace the rotors every time I replace the pads?
No. A rotor may remain in service when it meets Toyota’s thickness and condition limits, mounts flat, and has no cracks, severe scoring, damaging corrosion, unacceptable runout, or vibration problem. Replace or machine it only when the measured condition and the manufacturer’s limits support that decision.
Why does the brake pedal go low after installing new pads?
Retracting the caliper pistons creates extra clearance between the pads and rotors. Pump the pedal slowly while parked until it becomes firm. If the pedal remains low, sinks, or feels spongy, do not drive. Check for leaks, missing parts, an opened hydraulic circuit, or another brake-system fault.
Do I need to bleed the brakes after a pad-only replacement?
Normally, a pad-only replacement does not require bleeding when no hose, line, bleeder, caliper, or other hydraulic connection was opened and the pedal becomes firm. Bleed the system when the hydraulic circuit was opened or air is present, using Toyota’s specified sequence and fluid.
Conclusion
A successful 2014 Tundra brake-pad replacement depends on correct fitment, safe support, careful hardware handling, measured rotor inspection, controlled piston retraction, clean friction surfaces, and exact torque. Keep optional painting separate from the brake work, pump the pedal before moving, test at low speed, and follow the pad manufacturer’s bedding procedure. Stop and repair any leak, abnormal drag, noise, pull, vibration, overheating, or soft pedal before normal driving.
Sources
- Toyota Manuals and Warranties — owner-manual access, vehicle-specific operating guidance, and maintenance references.
- Toyota Technical Information System — factory repair procedures, diagrams, service limits, and torque specifications.
- 29 CFR § 1910.1001, Asbestos — controlled cleaning practices for automotive brake and clutch service and restrictions on compressed-air dust removal.
- PowerStop Brake Pad Break-In Procedure — an example showing why bedding steps are product-specific.
- Google Search Central: Changes to HowTo and FAQ Rich Results — current limitations on HowTo and FAQ search appearances.