How to Adjust a jogging stroller Handlebar Safely
Last updated: May 28, 2026 | Reviewed by: SellySell Editorial Team
This guide explains general handlebar setup for adjustable jogging strollers. Always follow your stroller manual first because brands use different locking parts, tools, and safety warnings.
What’s in This Article
- Quick Answer
- Who This Guide Is For
- Why Handlebar Height Matters
- Before You Begin
- Tools You May Need Before You Adjust the Handlebar
- Quick Step List
- Step 1: Find the Handlebar Adjustment Mechanism
- Step 2: Loosen the Handlebar Screws or Clamp
- Step 3: Set the Handlebar to a Comfortable Height
- Step 4: Level and Secure the Handlebar
- Step 5: Test Comfort, Steering, and Stability
- Handlebar Fit Checklist
- Common Issues to Look Out For
- Regular Maintenance for Long-Term Use
- Extra Tips for Better Handlebar Adjustment
- When to Stop Using the Stroller for Jogging
- Frequently Asked Questions
- References
A jogging stroller handlebar that sits at the wrong height can turn a simple run into sore wrists, tight shoulders, and poor steering control. The right setting helps you push with relaxed arms, a steady grip, and better control before your child rides with you.
You only need a few minutes, your stroller manual, and the correct tool for your model. This guide shows you how to find the adjustment mechanism, set a safer height, secure the handlebar, and test the stroller before you jog.
Quick Answer
To adjust a jogging stroller handlebar, stop the stroller, engage the brake, and remove your child first. Find the lever, knob, clamp, button, or screws near the handlebar base. Loosen the mechanism only enough to move the handlebar, set it near waist level, then tighten or lock it firmly. Test for wobble, slipping, steering pull, and brake function before jogging.
Key Takeaways
- Check your stroller manual before you loosen any handlebar part.
- Set the handlebar near waist level so your shoulders relax, wrists stay straight, and elbows stay slightly bent.
- Remove your child before adjustment and keep small tools away from children.
- Tighten every clamp, screw, knob, button, or lever before you place your child in the stroller.
- Test steering, wobble, brakes, and handlebar comfort before you jog.
- Stop jogging with the stroller if the handlebar slips, cracks, sticks, or fails to lock.
Who This Guide Is For
This guide is for parents and caregivers who use an adjustable jogging stroller and want a safer, more comfortable handlebar position. It works best for models with a visible lever, knob, clamp, push button, or screw-based adjustment system.
This guide is not a repair manual. If your handlebar is fixed, cracked, bent, missing parts, or already loose after tightening, check your manual and contact the manufacturer before you jog.
| Stroller Situation | What to Do |
|---|---|
| Adjustable handlebar with lever, knob, clamp, button, or screw | Follow the steps below and confirm the lock before jogging |
| Fixed handlebar with no adjustment point | Do not force it; use posture checks and confirm fit before longer runs |
| Loose, cracked, bent, or damaged handlebar | Stop jogging with the stroller and contact the manufacturer or a repair technician |
Why Handlebar Height Matters

You may not notice handlebar height until your wrists, shoulders, or lower back start to feel sore. A better fit helps you push with a more natural posture and steadier control.
Set the handlebar so your arms can stay slightly bent and your wrists can stay straight. Most users should start near waist level, then adjust up or down based on body height, stroller design, shoe height, and running style.
A secure handlebar also supports better steering and stability. The American Academy of Pediatrics advises parents to use stroller brakes when stopped, choose a stable stroller, lock folding parts before use, and avoid hanging bags from stroller handles because that can make a stroller tip backward.
U.S. Consumer Product Safety Commission guidance for carriages and strollers also covers performance requirements such as parking brakes, stability, restraint systems, wheel assemblies, and latching mechanisms. Those rules apply to manufacturers, but they show why parents should treat locks, brakes, wheels, and handlebar parts as safety items instead of comfort-only parts.
A properly adjusted handlebar can improve comfort, control, and confidence during a jog, but only if the locking mechanism works correctly.
Before You Begin
Estimated total time: 5 to 10 minutes.
Park the stroller on a flat surface before you adjust the handlebar. Engage the brake, remove your child from the stroller, and keep small tools away from children.
Check your owner’s manual before you loosen any part. Different jogging strollers use different adjustment systems, including levers, knobs, clamps, quick-release buttons, or screws.
Warning: Do not adjust the handlebar while the stroller moves or while your child sits in it.
Quick check: Before you touch the handlebar, confirm the brake holds, the stroller stands fully open, and the frame locks into place.
Tools You May Need Before You Adjust the Handlebar
Many jogging strollers adjust without tools, but some models need a small hand tool. Keep the manual nearby so you use the right size and avoid damaging the fasteners.
You may need an Allen wrench, a screwdriver, a measuring tape, and a soft cloth. Safety goggles can help protect your eyes if you work near worn screws, rust, dirt, or loose debris.
Necessary Tools Overview
Use this tool list as a guide, not a replacement for your stroller manual.
| Tool | Purpose |
|---|---|
| Allen Wrench | Loosens or tightens handlebar bolts on some models |
| Screwdriver | Adjusts screws if your stroller uses screw fasteners |
| Measuring Tape | Helps you repeat the same height setting later |
| Safety Goggles | Protects your eyes while you work near small parts |
| Soft Cloth | Cleans sweat, dust, and dirt from the handlebar |
Safety Equipment Importance
Safety gear matters because small parts can slip while you work. Wear safety goggles if you need to loosen tight screws or work around grit, rust, or worn parts.
Use the exact tool size your stroller needs. A loose Allen wrench or wrong screwdriver can strip a screw head and make the handlebar harder to secure.
Measuring Height Accurately
Place the stroller on a flat surface and stand in your normal pushing position. Let your arms rest naturally, then check whether the handlebar sits near your waist.
You can mark the preferred height with a measuring tape if more than one adult uses the stroller. This makes it easier to return to your fit after someone else adjusts it.
Quick Step List
- Park the stroller on level ground and engage the brake.
- Remove your child from the stroller.
- Check the manual for your model’s handlebar adjustment method.
- Find the lever, knob, clamp, button, or screw at the handlebar base.
- Loosen the mechanism just enough to move the handlebar.
- Set the handlebar near waist level with your arms relaxed.
- Tighten or lock the mechanism until the handlebar stays firm.
- Push the stroller slowly and check for wobble, drift, slipping, or loose movement.
Step 1: Find the Handlebar Adjustment Mechanism
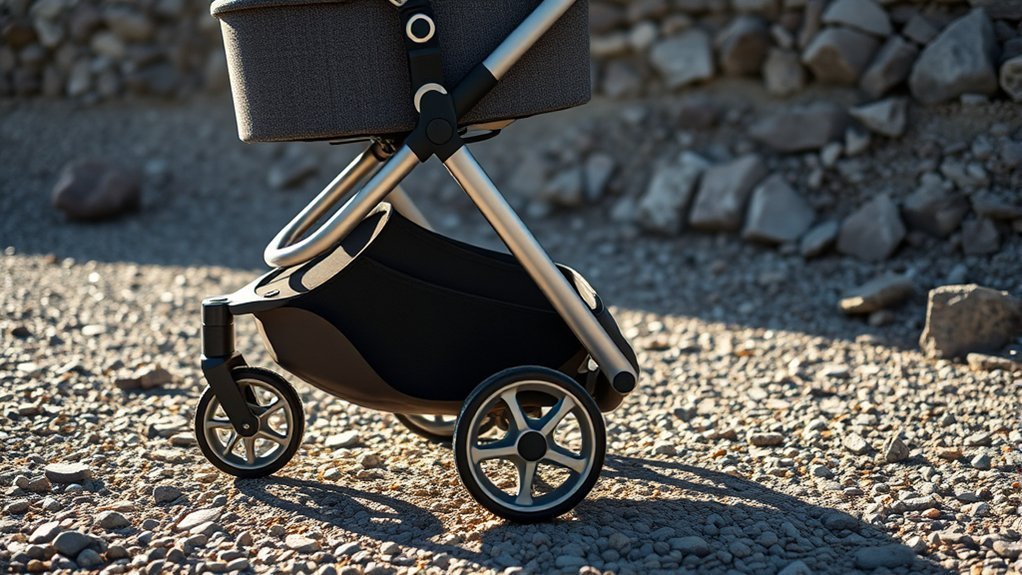
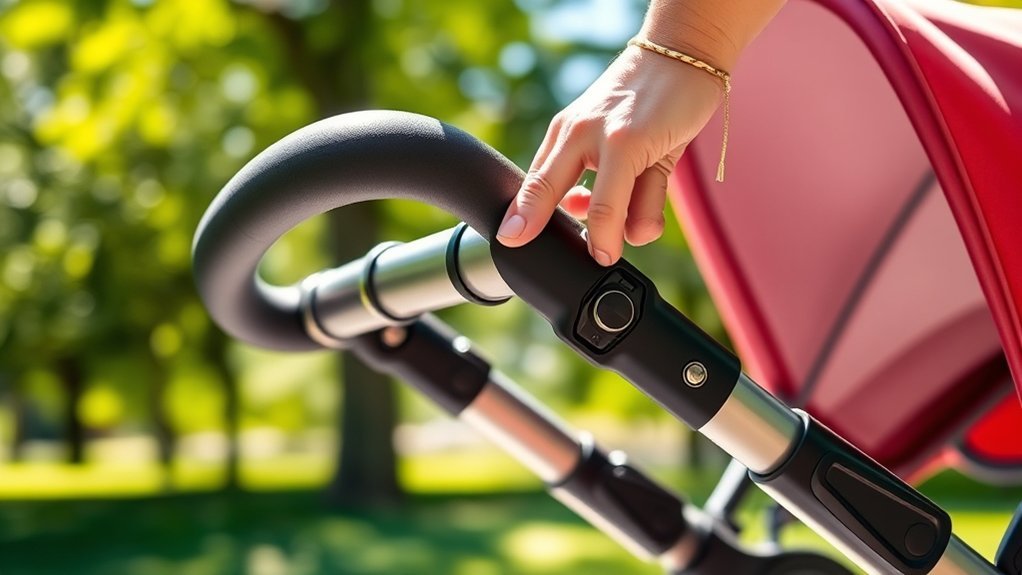
To adjust your jogging stroller handlebar, first find the adjustment mechanism. Most adjustable models place it near the handlebar base, where the handle connects to the frame.
Your stroller may use a quick-release lever, push button, twist knob, clamp, or screw system. Check your user manual before you loosen anything because each model works differently.
Locate the Lever, Knob, Clamp, Button, or Screw
Start near the handlebar stem and look for a lever, knob, clamp, button, or screw. Many brands make this part easy to touch and grip, so you can adjust the bar without guessing.
If your stroller has several handlebar positions, move slowly from one position to the next. Listen or feel for the locking point if your model uses a click-in system.
Identify the Release Mechanism
Different strollers use different release mechanisms. Look for these common designs:
- Levers: Flip or squeeze the lever near the handlebar base.
- Knobs: Twist the knob until the handlebar moves.
- Screws: Use the correct Allen wrench or screwdriver.
- Quick-release buttons: Press the button while supporting the handlebar.
- Clamps: Open the clamp, adjust the bar, then close it firmly.
A working release mechanism helps you adjust the handlebar without forcing parts. If the mechanism sticks, stop and inspect it before you use more pressure.
Check the User Manual
Your manual gives model-specific instructions for loosening, moving, and locking the handlebar. It may also show warnings about pinch points, fasteners, brakes, and safe use.
If you can’t find the printed manual, check the manufacturer’s website for a digital copy. Use the exact stroller model name so you don’t follow the wrong instructions.
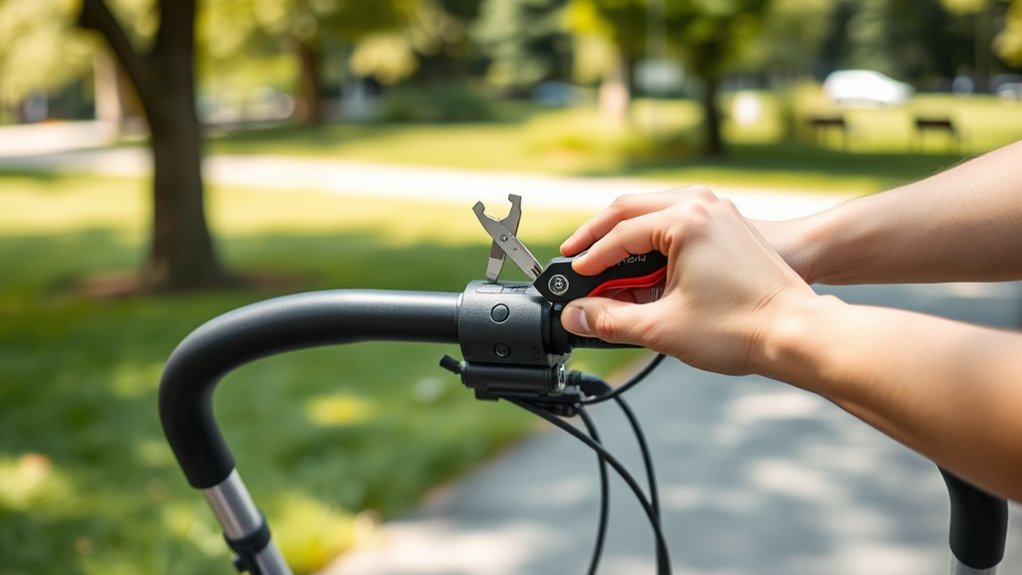
Step 2: Loosen the Handlebar Screws or Clamp
Use the right tool if your stroller uses screws or bolts. Turn the screw counterclockwise only enough to let the handlebar move.
Loosen the adjustment mechanism just enough to move the handlebar, then keep all parts attached.
Do not remove screws unless the manual tells you to. Small parts can get lost, and the handlebar may become harder to secure.
- Match the Allen wrench or screwdriver to the fastener size.
- Turn slowly so you do not strip the screw head.
- Support the handlebar while you loosen the mechanism.
- Stop if you see cracks, rust, missing parts, or bent hardware.
Step 3: Set the Handlebar to a Comfortable Height
Now move the handlebar into a comfortable pushing position. Stand behind the stroller with relaxed shoulders and keep your elbows slightly bent.
Use this table as a general fit guide. Your body shape, shoe height, stroller design, and running style can change the best setting.
| User Height | Starting Handlebar Range | Fit Check |
|---|---|---|
| 5’0″ – 5’3″ | Near lower settings | Wrists stay straight |
| 5’4″ – 5’6″ | Near lower-middle settings | Elbows stay slightly bent |
| 5’7″ – 6’0″ | Near middle-upper settings | Shoulders stay relaxed |
| 6’1″ + | Near upper settings | Back stays upright |
Pro tip: Choose the height that lets you push without shrugging your shoulders, bending your wrists, or leaning heavily on the handlebar.
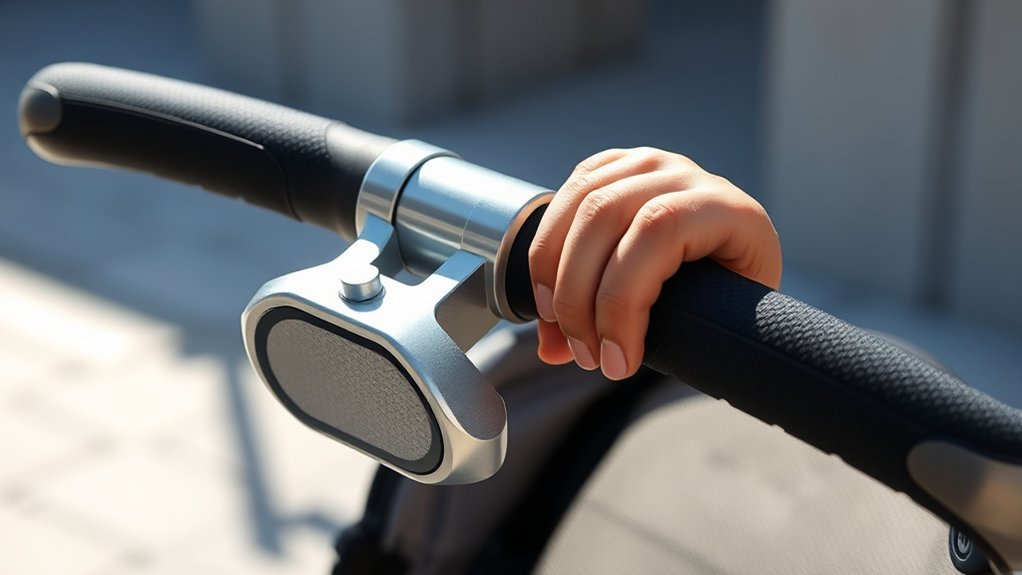
Step 4: Level and Secure the Handlebar
After you set the height, check that both sides sit evenly. A crooked handlebar can make steering harder and may cause one arm to work more than the other.
Tighten the adjustment mechanism according to the manual. If your stroller uses a lever or clamp, close it fully and confirm that the handlebar no longer slips.
Check Alignment Accuracy
Stand behind the stroller and look across the handlebar. The bar should feel level and centered when you grip it with both hands.
- Align the handlebar near your waist level.
- Push the stroller forward slowly and watch for wobble.
- Check both sides for uneven movement.
- Inspect the fasteners for looseness or visible wear.
Tighten Securely After Adjusting
Once the handlebar lines up, tighten every screw, clamp, knob, button, or lever. The handlebar should not slide, twist, click, or drop out of position when you push down gently.
Do a short stability test before you place your child in the stroller. If the handlebar moves, loosen the mechanism, reset the height, and secure it again.
Step 5: Test Comfort, Steering, and Stability
After you adjust the handlebar, test the stroller on a flat, open area. Grip the handlebar, keep your wrists straight, and push slowly before you jog.
Check how the stroller turns, stops, and tracks. If it pulls to one side or feels loose, stop and inspect the adjustment mechanism again.
- Confirm smooth movement without drifting to one side.
- Test slow turns before you jog at normal pace.
- Check the handlebar for wobble or slipping.
- Adjust again if your shoulders, wrists, or back feel strained.
- Confirm the parking brake engages and releases correctly before you leave.
The right setup should feel steady and natural. If comfort or control feels off, stop and correct the fit before your run.
Handlebar Fit Checklist
Use this checklist after every handlebar change. It helps you catch common comfort and safety issues before you start jogging.
| Fit Point | What You Want | What to Change |
|---|---|---|
| Wrists | Straight and relaxed | Raise or lower the handlebar if your wrists bend sharply |
| Elbows | Slightly bent | Avoid a setting that locks your arms straight |
| Shoulders | Down and relaxed | Lower the handlebar if you shrug while pushing |
| Back | Upright without hunching | Raise the handlebar if you lean forward too much |
| Handlebar lock | No slipping, clicking, or wobble | Reset and tighten the lock before placing your child inside |
Common Issues to Look Out For
Even after you adjust the handlebar, you should check for problems that can affect safety and comfort. Loose screws, worn clamps, cracked plastic, rust, and bent parts need quick attention.
Stop using the stroller for jogging if the handlebar slips, wobbles, or fails to lock. Contact the manufacturer or a qualified repair technician if you can’t fix the issue with the manual’s instructions.
- Stripped screws: The tool slips or the screw head looks rounded.
- Sticky release parts: Dirt or rust may block smooth adjustment.
- Uneven handlebar height: One side sits higher than the other.
- Loose lock: The handlebar moves after you tighten it.
- Frame damage: Cracks, dents, or missing fasteners can affect safety.
- Brake concerns: The stroller rolls after you set the brake.
Regular Maintenance for Long-Term Use
Regular checks help keep your jogging stroller ready for safer use. They also help you catch loose or worn parts before they cause a bigger problem.
Thule’s stroller instructions advise users to inspect fasteners, check for damage, clean parts, and keep moving parts in good condition. Your own manual may give a different service schedule, so follow that first.
- Check and tighten handlebar fasteners on a regular schedule.
- Clean sweat and dirt from the handlebar with a soft cloth.
- Inspect the frame, brakes, wheels, tires, harness, and locking parts.
- Lubricate moving parts only if your manual recommends it.
- Check the CPSC recall database if you bought the stroller used or do not know its service history.
- Stop using the stroller if you find cracks, missing fasteners, loose locks, or brake problems.
Extra Tips for Better Handlebar Adjustment
Ask every regular user to test the handlebar height. A setting that works for one adult may strain another user’s wrists or shoulders.
Keep bags and heavy items off the handlebar. The American Academy of Pediatrics and Nationwide Children’s Hospital both warn that hanging heavy items from stroller handles can increase tip risk. Use the storage basket only within your stroller manual’s weight limit.
Check the handlebar again after folding, travel, storage, or rough surfaces. Movement and vibration can loosen parts over time.
If you run often, pay attention to your own posture too. A 2025 PLOS One study found that running with a stroller can change loading patterns for runners, so a comfortable handlebar setup should support relaxed control rather than heavy leaning or forced arm position.
When to Stop Using the Stroller for Jogging
Some handlebar problems need more than a quick adjustment. Stop jogging with the stroller until you solve the issue if you notice any of these warning signs:
- The handlebar slips after you tighten it.
- The adjustment lever, clamp, knob, button, or screw does not lock.
- The handlebar clicks, drops, twists, or wobbles during a push test.
- You see cracks, bent metal, missing fasteners, rust, or broken plastic near the handlebar joint.
- The stroller pulls to one side after you confirm the handlebar sits level.
- The brake does not hold the stroller still on flat ground.
- The stroller model appears in a current recall notice.
Safety note: Do not repair structural stroller parts with tape, glue, zip ties, or non-original fasteners. Contact the manufacturer if the handlebar lock or frame shows damage.
Frequently Asked Questions
Can I Adjust the Handlebar While the Stroller Is in Use?
No. Stop the stroller, engage the brake, and remove your child before you adjust the handlebar. This reduces the risk of slipping parts, pinched fingers, or sudden stroller movement.
What if the Adjustment Mechanism Is Stuck?
Do not force a stuck adjustment mechanism. Check for dirt, rust, bent parts, or a locked safety button, then follow the manual’s cleaning or service steps.
Are There Specific Heights Recommended for Different Users?
Most users should start near waist level, then adjust for relaxed shoulders, straight wrists, and slightly bent elbows. The best height can vary by stroller design and user posture.
How Often Should I Check the Handlebar Adjustment?
Check the handlebar before each jog and after folding, travel, storage, or rough surfaces. Tighten or lock the mechanism again if you notice slipping, wobbling, clicking, or uneven movement.
Can I Use Tools Other Than an Allen Wrench for Adjustments?
Use the tool your stroller manual recommends. A screwdriver may work on some models, but the wrong tool can strip screws or damage the adjustment parts.
What Should I Do if My Stroller Handlebar Still Wobbles After Tightening?
Stop using the stroller for jogging until you identify the cause. Check for worn clamps, stripped screws, cracked plastic, missing fasteners, or bent frame parts. Contact the manufacturer or a qualified repair technician if the wobble remains.
Can All Jogging Stroller Handlebars Be Adjusted?
No. Some jogging strollers have fixed handlebars. If your model has no lever, knob, clamp, button, or adjustment screw, do not force the handlebar. Check the manual to confirm whether the handlebar adjusts.
Should the Handlebar Be at Waist Height or Hip Height?
Start near waist height, then fine-tune by comfort. Your wrists should stay straight, your shoulders should stay relaxed, and your elbows should stay slightly bent. If your back hunches or your wrists bend, try another setting.
Is It Safe to Hang a Diaper Bag From the Jogging Stroller Handlebar?
Avoid hanging heavy bags from the handlebar. Pediatric safety guidance warns that items on stroller handles can increase tip risk. Store items in the stroller basket if your model allows it and stay within the manual’s weight limit.
Safety Disclaimer: This article shares general stroller setup information only. Always follow your stroller manual, product labels, and recall notices. Contact the manufacturer or a qualified repair technician if the handlebar, brakes, frame, wheels, harness, or locking parts feel loose or damaged.
Conclusion
A good handlebar fit helps you push your jogging stroller with better comfort, control, and confidence. Start near waist level, keep your wrists straight, then tighten every locking part before you place your child in the stroller.
Take one minute before each run to check the handlebar, brakes, wheels, harness, and frame. That simple habit helps you spot loose parts early and avoid jogging with a stroller that does not feel stable.
If the handlebar locks firmly and your posture feels natural, your run can feel smoother for both you and your child. If anything slips, clicks, wobbles, or feels unsafe, stop and check the manual before you continue.
References
- How to Choose a Safe Baby Stroller – HealthyChildren.org, American Academy of Pediatrics
- Carriages and Strollers Business Guidance – U.S. Consumer Product Safety Commission
- Recalls & Product Safety Warnings – U.S. Consumer Product Safety Commission
- Safety Tips on Strollers – Consumer Product Safety Office, Singapore
- Revisions to Safety Standard for Carriages and Strollers – Federal Register, 2019
- Thule Urban Glide 3 Instructions – Thule
- Study Finds Average of Two Injuries Every Hour in the U.S. from Strollers and Carriers – Nationwide Children’s Hospital
- Biomechanical Tradeoffs in Stroller Running – PLOS One, 2025