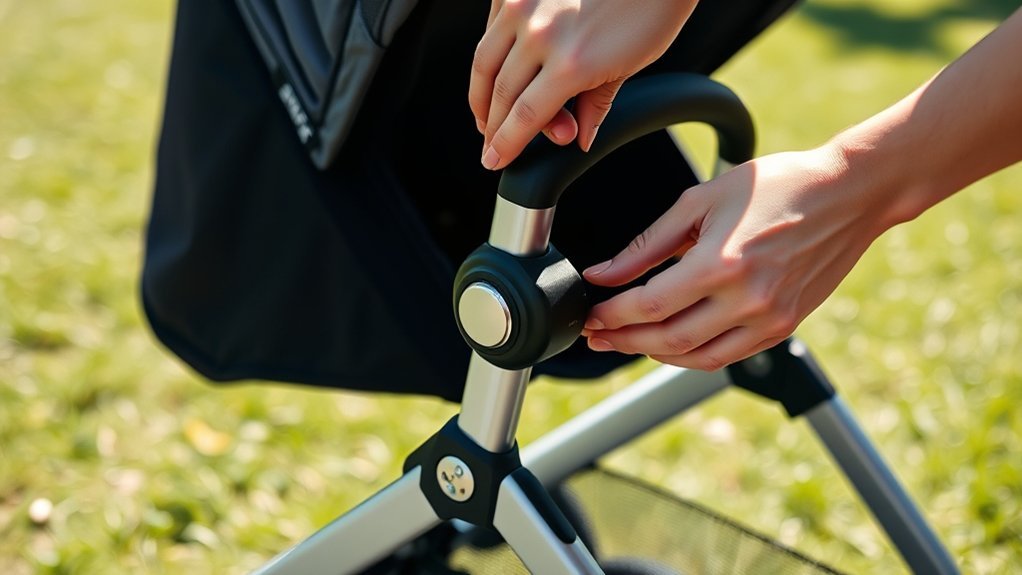
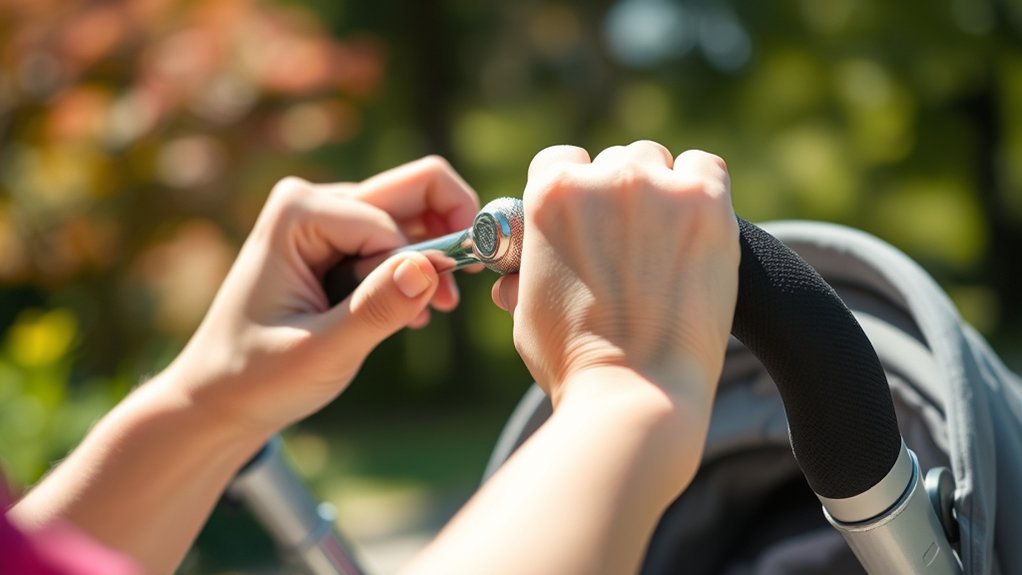
Tightening your stroller handle is super important for safety and stability. Start by grabbing a Phillips head screwdriver and check the six screws on each side of the chassis, plus two screws at the handle. Make sure everything’s snug! Don’t forget to look at the connection points too. If you find any screws are broken or loose, replace them right away. Stick around for more tips on keeping your stroller in top shape!
Understanding the Importance of a Tight Chassis
When you’re out and about with your stroller, you mightn’t think much about the chassis, but it’s essential for your safety and the stroller’s longevity.
A loose upper chassis can cause serious problems, increasing stress on side bars and potentially leading to breakage. Ever noticed how heavy items hung from the handle can make things worse?
A loose upper chassis can lead to serious issues, increasing stress on side bars and risking breakage.
That’s why regular maintenance is key! Models like the Baby Jogger City Elite are particularly vulnerable if not tightened properly.
By checking and tightening those key screws, you can enhance chassis stability and guarantee stress reduction.
Just imagine gliding through the park, worry-free, knowing your stroller’s built to last. Trust me, a little upkeep now goes a long way!
Identifying Affected Models
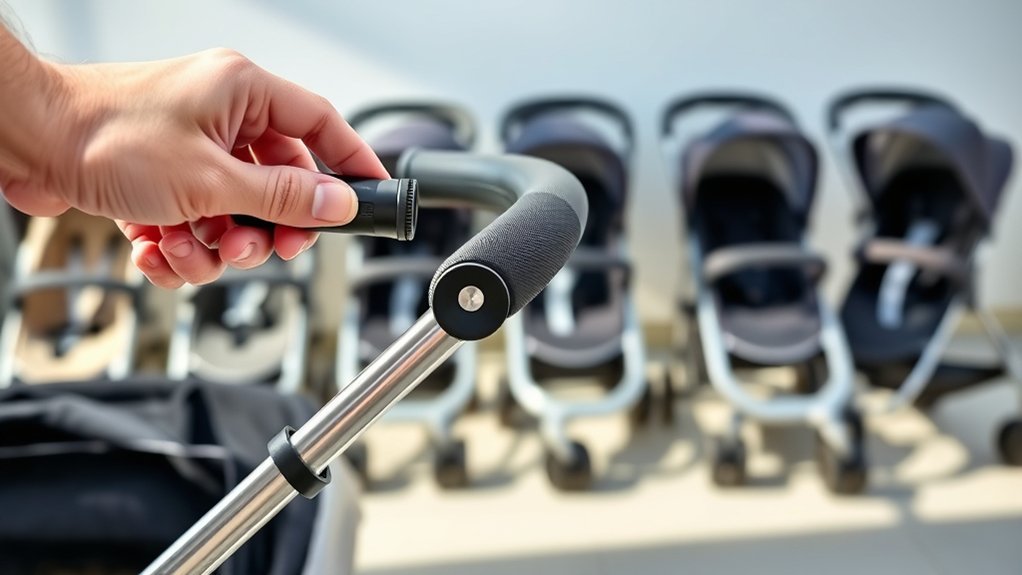
If you own a Baby Jogger stroller, it’s good to know which models are more prone to handle issues. The Baby Jogger City Elite, with its adjustable handles, often faces chassis looseness, so be sure to keep an eye on it.
Recognizing model differences is key; the Classic City Mini, for instance, has a single handle and fewer adjustment points, making it less likely to have issues, but it still needs routine checks.
Regularly identifying structural weaknesses, like loose screws or fractures, can save you from bigger problems down the line. So, grab that toolkit and inspect those six screws on either side of the chassis.
It’s all about keeping your stroller safe and functional for those adventurous outings!
Key Areas to Check for Tightening
To keep your stroller handle secure and functional, it’s vital to check a few key areas regularly. Taking a few minutes to inspect these spots can save you headaches down the road.
Here’s what to focus on:
- The six screws on either side at the top of the chassis for stability
- The two screws running through the handle to prevent breakage
- Connection points of the handle assembly to the arms for functionality
- The two screws on either side of the chassis for overall stability
- Crossbar screws, which are essential for securing the entire structure
Tools You’ll Need for the Task
Before you get started on tightening your stroller handle, let’s talk about the tools you’ll need.
A good Phillips head screwdriver is essential, and having a torque wrench handy will make sure you don’t overdo it.
Don’t forget a flashlight to help you see those tricky screws hiding in the shadows!
Essential Tools Required
When you’re ready to tighten your stroller handle, having the right tools on hand can make all the difference.
You don’t want to face a wobbly handle while juggling your little one! Here’s what you’ll need:
- Phillips screwdriver for those six screws on the chassis
- Flathead screwdriver for crossbar screws
- Torque wrench to meet those torque specifications
- Small flashlight to spot hard-to-see screws
- Replacement screw set in case you find any broken screw types
With these essentials, you’ll be set to give your stroller handle a solid fix.
Trust me, having the right tools makes the whole process smoother and more enjoyable.
Happy tightening!
Safety Gear Recommendations
Getting ready to tighten your stroller handle isn’t just about the tools; it’s also about protecting yourself while you work.
First off, grab those safety goggles. They’re essential for eye protection against any flying debris or sneaky screws.
And don’t forget a soft cloth or mat to place under the stroller. This not only keeps your work area clean but also guards against scratches.
Having a Phillips head screwdriver and a torque wrench on hand is vital for screw safety—tightening them just right is key.
Finally, keep a set of replacement screws nearby. You never know when you might find a broken one during your inspection.
With the right protective equipment, you’ll work safely and efficiently!
Step-by-Step Guide to Tightening Screws
Tightening the screws on your stroller handle is a straightforward task that can make a big difference in its stability. Here’s how you can do it:
- Locate the six screws on either side at the top of the chassis.
- Grab a screwdriver and tighten the two screws running through the handle.
- Check the connection points of the handle assembly to the arms, and secure any loose screws.
- Don’t forget those two screws on either side running through the chassis for added stability.
- Regularly inspect for any damage to screw types, replacing broken ones as needed.
With a little effort, these handle adjustments can guarantee a safer ride for you and your little one!
Recognizing Common Screw Issues
While you mightn’t think about it often, recognizing common screw issues can save you a lot of headaches down the road.
Start by checking the opposing sides of the stroller handle; this guarantees even pressure and stability.
Check both sides of the stroller handle for balanced pressure and stability to ensure a safe ride.
Don’t forget to inspect the screws for free movement within the nuts—restricted movement can signal underlying problems.
Keep an eye out for wear signs, especially broken screws that may seem fine externally but are fractured inside.
It’s vital to replace any screws showing damage to maintain your stroller’s integrity.
Regular inspections are a smart habit that can catch issues early and prevent more extensive damage.
Trust me, staying on top of these screw types will enhance safety for your little one!
Maintenance Tips for Prolonged Use
To keep your stroller in top shape for years to come, it’s crucial to adopt a few maintenance habits that can save you from unexpected issues.
Regular checks might feel tedious, but they’re essential for stroller longevity. Here are some simple maintenance frequency guidelines to follow:
- Inspect and tighten the six screws on each side of the chassis regularly.
- Check the two handle screws to confirm stability.
- Evaluate connection points of the handle assembly to the arms.
- Tighten opposing screws simultaneously for balanced tension.
- Replace any broken or damaged screws promptly.
When to Seek Professional Help
Sometimes, despite your best efforts to keep your stroller handle secure, you might find it still feels loose or unstable. In those cases, it’s time to seek professional help. Here are some signs that indicate you need a professional assessment:
| Signs to Watch For | What to Do | When to Consult a Technician |
|---|---|---|
| Persistent looseness | Tighten regularly | If it remains unstable |
| Broken screws or damaged parts | Attempt a DIY fix, if possible | If repairs are beyond your skill set |
| Wear or instability at joints | Check connections | If adjustments don’t secure the handle |
If you often carry heavy items and notice instability, a professional can recommend modifications to enhance safety. Don’t hesitate—your stroller’s safety is worth it!
Frequently Asked Questions
How Often Should I Check My Stroller’s Handle Tightness?
You should check your stroller’s handle tightness regularly, ideally before each outing. Consistent stroller maintenance tips suggest adjusting the handle whenever you notice any looseness—this’ll guarantee a safer, more enjoyable experience for both you and your child.
Can I Use Any Screwdriver for This Task?
Not all screwdrivers are created equal! For handle adjustment, you’ll need the right type—typically a Phillips or flathead. Using the wrong one can feel like trying to fit a square peg in a round hole!
What Are the Signs of a Loose Stroller Handle?
You’ll notice a loose stroller handle if it wobbles during use, feels unstable, or requires extra effort to steer. Keep these stroller maintenance tips in mind, and try handle adjustment techniques for better stability.
Is It Safe to Use a Stroller With a Loose Handle?
Using a stroller with a loose handle isn’t safe. You risk losing control, which can lead to accidents. Regular handle maintenance guarantees stroller safety, so check and tighten that handle before heading out with your little one!
Should I Replace Screws if They’re Stripped?
Yes, you should definitely replace stripped screws. It’s essential for handle maintenance. Using new screws not only keeps the stroller safe but also gives you peace of mind during those busy outings with your little one.
Conclusion
So, there you have it! Tightening your stroller handle isn’t rocket science—it’s more like a quick pit stop at a gas station. With just a few tools and a little know-how, you can guarantee your stroller’s ready for any adventure, whether it’s a stroll through the park or a sprint to catch the bus. Don’t forget to check it regularly, and if all else fails, don’t hesitate to call in the pros. Happy strolling!