Want to give your stroller a comfort boost? First, gather your tools—a small Phillips screwdriver is key! Flip the stroller upside down to access those pesky screws. Carefully remove the old handle covers and choose high-quality replacement foam. Measure it to guarantee a perfect fit before installing the new covers snugly. Don’t forget to tighten those screws. With a bit of prep, you’ll make strolling with your little one even better. Stick around for more helpful tips!
Tools You’ll Need

Before you plunge into replacing the foam on your stroller’s handlebar, you’ll want to make sure you’ve got the right tools at hand.
All you really need is a small Phillips head screwdriver—trust me, it makes a world of difference! Make sure it’s the correct size for easy access to those pesky screws on the handle covers.
A small Phillips head screwdriver is essential—having the right size makes accessing those tricky handle cover screws a breeze!
I’ve learned the hard way that working in a well-lit area can save you a lot of frustration, especially when dealing with different handlebar materials.
Gather everything you need before starting; it’ll streamline the whole process and keep you focused. A little preparation can go a long way, reducing your time spent fiddling around and giving you back those precious moments to enjoy your stroll!
Preparing Your Stroller
Now that you’ve gathered your tools and set the stage, it’s time to prepare your stroller for the handlebar foam replacement. Getting this right will make all the difference in your handle comfort improvements!
Here are some quick stroller maintenance tips to follow:
- Work in a well-lit area: Good lighting helps you see the screws and components clearly.
- Flip the stroller upside down: This gives you easy access to the four screws under each handle cover.
- Familiarize yourself with the handle structure: Knowing the shape will aid in correct alignment when you reattach the covers.
Taking these steps guarantees a smoother process, making your stroller feel like new again. You’re on your way to a comfy ride!
Removing the Old Handle Covers
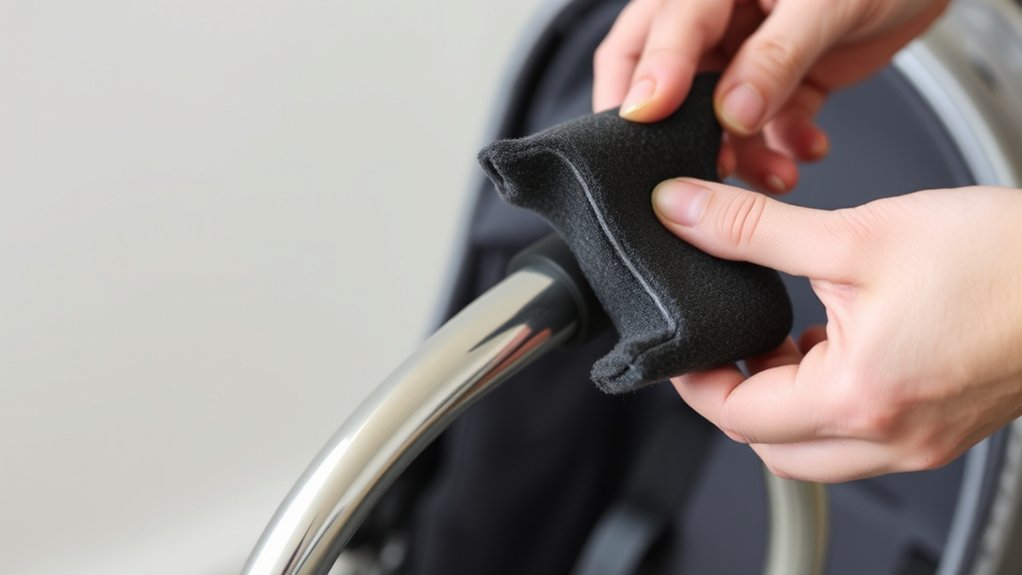
Ready to plunge into removing the old handle covers? First, flip your stroller chassis upside down for easy access to those screws.
Locate the four outer screws at the bottom of each handle cover—these are your starting point. Use a small Phillips head screwdriver to avoid damaging anything.
Once those are out, tackle the four inner screws. Keep your workspace well-lit; it makes a difference!
When you’ve unscrewed everything, the handle pieces should separate easily, letting you pull off those worn handle cover materials.
If you’ve noticed the foam durability has dwindled, this is a great time to swap them out. Trust me, you’ll love the fresh feel of new covers!
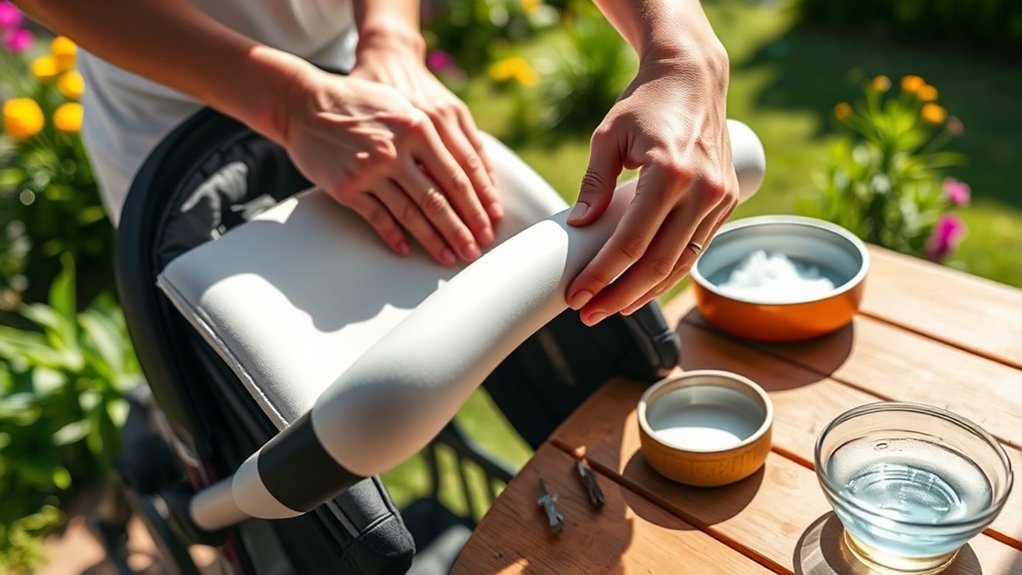
Selecting Replacement Foam
With those old handle covers removed, it’s time to focus on selecting the right replacement foam for your stroller.
Now that you’ve taken off the old handle covers, it’s time to find the perfect replacement foam for your stroller.
You want something that not only fits but also feels good during those long walks. Here are three tips to guide you:
- Check Compatibility: Verify the foam material types match your stroller model—Emmaljunga has specific designs for various models.
- Choose Quality: Opt for high-quality foam or leather. You’ll appreciate the durability and handlebar comfort on your outings.
- Measure and Thickness: Measure your existing handlebars. Thicker foam can enhance grip, but make sure it doesn’t compromise the overall feel.
Trust me, a snug fit makes all the difference in your stroller experience!
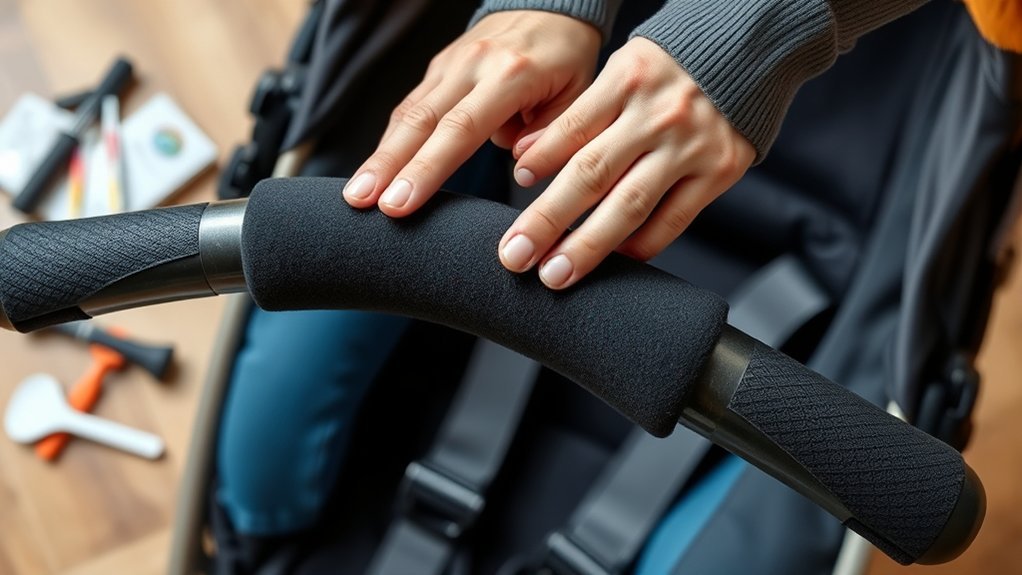
Installing the New Handle Covers
Now that you’ve got your new handle covers, it’s time to get them installed.
Start by aligning the cover pieces with the handle—this step is key for a snug fit.
Once they’re in place, secure them with the screws you saved, making sure everything’s tight and ready for action!
Aligning Handle Cover Pieces
Before you plunge into reattaching the handle cover pieces, it’s helpful to start with the one that doesn’t have a tag; this guarantees you get the orientation right on your stroller.
Getting the cover alignment just right makes a huge difference in the look and feel of your stroller.
Here’s how to ascertain a smooth process:
- Check Handle Orientation: Position the untapped cover first to match the contours.
- Align the Pieces: Carefully fit the covers snugly, ensuring they sit flush against the handle.
- Verify Screw Holes: Before screwing in, double-check that the holes align perfectly to avoid misalignment.
Take your time; a properly aligned handle cover not only looks great but also enhances your stroller’s functionality!
Securing With Screws
Securing the new handle covers is a straightforward process that can really enhance your stroller’s usability.
First, align the piece without the tag at the top for proper placement. Grab a small Phillips head screwdriver—the right screw types make all the difference!
Start by tightening the four inner screws first; this guarantees a tight fit before you move to the outer screws. Trust me, I’ve learned the hard way that a snug handle prevents wobbling.
Double-check that everything’s aligned during reassembly to keep your stroller’s structure intact.
Finally, confirm all screws are adequately tightened to avoid any looseness.
With these simple installation techniques, you’ll have a sturdy, reliable handle ready for your next adventure!
Final Checks for Safety
As you wrap up the handlebar foam replacement, it’s vital to perform a few final safety checks to confirm everything’s in top shape.
Trust me, those quick safety inspections can save you a headache later! Here are a few things to check:
- Screw Tightness: Make sure all screws are secured tightly. Loose screws can lead to unexpected movements.
- Fit and Alignment: Look for any gaps or misalignments in the handle covers. A snug fit is essential for proper maintenance and grip.
- Overall Functionality: Test the handlebar by pushing down on it. Verify it feels stable.
Don’t forget to give the brakes and wheels a once-over too—your little one’s safety depends on it!
Frequently Asked Questions
Can I Use Any Foam for My Stroller Handlebar?
You can’t just use any foam for your stroller handlebar. Choose durable materials designed for handlebar comfort; it’ll last longer and feel great. Trust me, you’ll appreciate a solid grip during your walks!
How Often Should I Replace the Handlebar Foam?
You should replace the handlebar foam every 6 to 12 months, depending on usage. If you notice wear or tears, it’s time for a change. Consistent handlebar maintenance keeps your stroller feeling fresh and safe!
Is Replacement Foam Waterproof or Weather-Resistant?
Replacement foam isn’t typically waterproof, but you can find weather-resistant options that hold up against the elements. I’ve had great luck with those, keeping my handlebar comfy and durable, even during unexpected rain showers!
What if My Stroller Model Is Discontinued?
If your stroller’s discontinued, don’t fret! You can explore replacement options through aftermarket parts or even consider custom solutions. I once found great foam online that fit perfectly. You’ve got this!
Will Replacing the Foam Void My Stroller Warranty?
Replacing the foam usually won’t void your warranty, but check your stroller’s warranty policies first. I once swapped foam, and it didn’t cause issues—just be cautious about using compatible foam materials for the best results!
Conclusion
Now that you’ve tackled the handlebar foam replacement, imagine pushing your stroller with that fresh grip, feeling the comfort as you navigate through your day. It’s like giving your stroller a mini-makeover! Trust me, you’ll appreciate the new feel during your outings, making those strolls even more enjoyable. So, next time you see worn-out foam, don’t hesitate—grab your tools and jump in. You’ve got this, and your hands will thank you for it!


