
Stroller fabric can trap crumbs, spills, dust, and odors fast, especially if you use your stroller every day. The good news is that you can remove most stroller fabric at home with a few careful steps. This guide shows you how to detach the canopy, side struts, seat textiles, hard boards, and shopping basket so you can clean each part safely.
Quick Answer
To remove stroller fabric, start with the canopy, then detach the side struts, seat textiles, and shopping basket. Look for clips, elastic straps, buttons, Velcro flaps, and hard boards before you pull any fabric free. Check the care label before washing so you don’t shrink, fade, or damage the fabric.
Key Takeaways
- Remove the canopy first so you can reach the frame and seat fabric more easily.
- Release elastic straps, buttons, and Velcro flaps before pulling fabric from the stroller.
- Check for hard boards inside the textiles before you wash any fabric piece.
- Use cold water, gentle detergent, and air drying when the care label allows machine washing.
- Reassemble every strap, peg, clip, and basket button before you use the stroller again.
What’s in This Article
- Removing the Canopy
- Detaching Side Struts
- Removing Seat Textiles
- Handling Hard Boards
- Detaching the Shopping Basket
- Preparing for Washing
- Before You Begin
- Step-by-Step Fabric Removal
- Washing and Drying Stroller Fabric
- Common Mistakes to Avoid
- Reassembling the Stroller
- Frequently Asked Questions
- Final Check Before You Use the Stroller
Removing the Canopy
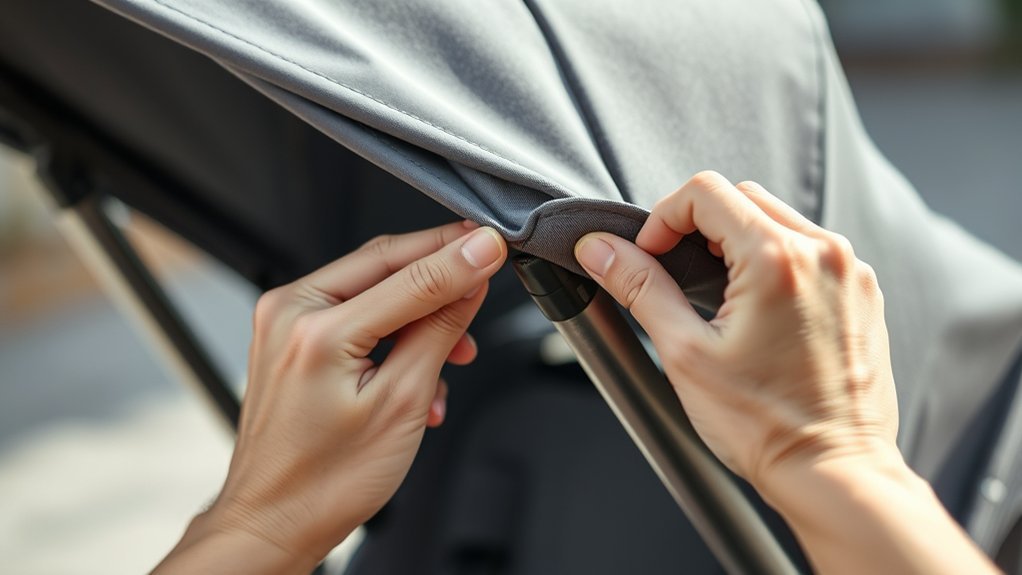
To remove the stroller canopy, locate the clips on both sides of the chassis.
Pull the canopy away from the clips with steady pressure. Don’t force it, because rough handling can crack clips or tear stitching.
Once you remove the canopy, clean and inspect it more easily. Wipe light dirt with a damp cloth and mild detergent, then let it dry fully before reattaching it.
Check the canopy for loose seams, bent rods, or worn fabric before you put it back on the stroller.
Detaching Side Struts
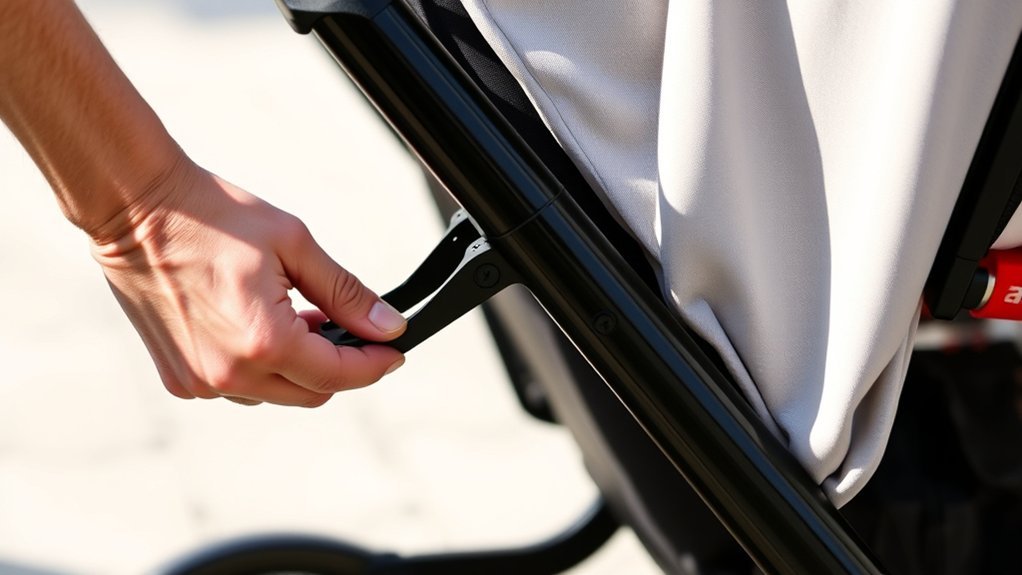
Removing the side struts helps you loosen the fabric for deeper cleaning or maintenance.
Find the circular peg at the end of each strut. This peg locks into the adjustment mechanism.
Use a small pointed tool to press the circle in the peg while you pull the strut away from the frame.
Press the circular peg at each strut end, then pull the strut away from the frame with gentle pressure.
Repeat the same step on the left and right side struts. Keep your fingers clear of pinch points while you work.
Once you remove both side struts, you can reach the seat fabric and frame more easily.
Warning: Stop pulling if a clip or peg resists, and check the stroller manual before you apply more force.
Removing Seat Textiles

To remove the seat textiles, start at the foot of the seat. Locate the two elastic straps attached to the middle pegs.
Detach the buttoned side straps so the seat fabric loosens. Then pull the back part of the seat over the adjustment button with care.
After you free all straps and buttons, lift the full textile piece from the seat. Check inside the fabric for hard boards before you wash it.
Elastic Strap Detachment Steps
Start by finding the two elastic straps at the foot of the seat. These straps usually connect to pegs in the middle of the seat base.
Unhook each strap without stretching it too far. Overstretching can weaken the elastic and make the seat fit loosely later.
Next, detach the side straps that button to the seat. This step frees the fabric and gives you more room to work.
Pull the back part of the seat over the adjustment button only after you remove all visible connections.
Back Seat Textile Removal
Taking off the back seat textile helps you clean the area where crumbs and spills often collect.
Follow these simple steps:
- Detach the elastic straps from the pegs at the foot of the seat.
- Unbutton the side straps so the textile can move freely.
- Pull the seat fabric over the adjustment button with slow, even pressure.
Check for hard boards inside the textiles before you place any piece in the washing machine.
Once you remove the textile, fold it loosely so it keeps its shape. Avoid tight folds that may crease boards or padding.
Hard Board Considerations
Some seat textiles include hard boards that add structure and support. These boards can make fabric removal and washing harder.
Check your stroller model before you wash the seat fabric. Older models may include boards that don’t come out.
If the boards come out, remove them before machine washing. If they don’t come out, spot clean the fabric instead.
| Hard Board Type | Textile Compatibility | Removal Tips |
|---|---|---|
| Removable | Machine washable when the care label allows it | Slide out gently |
| Non-removable | Spot clean only | Do not bend the board |
| Adjustable | Varies by model | Check the manual first |
Handling Hard Boards
Before you remove stroller fabric, check for hard boards inside the seat, backrest, or footrest. These boards support the fabric but can bend or crack during washing.
- Identify the board type: Check whether each board comes out or stays fixed.
- Check the care label: Confirm whether the fabric can go in the washer.
- Remove boards safely: Slide boards out slowly so you don’t tear the seams.
If a hard board stays fixed inside the fabric, avoid soaking it. Spot clean that area with a damp cloth and mild soap instead.
This careful approach protects both the board and the stroller textile.
Detaching the Shopping Basket
To detach the shopping basket, locate the buttons around its edge. Work around the basket one fastener at a time.
Press or pull each button carefully to release it. If one button sticks, use a flathead screwdriver to lift it gently.
Don’t rip at stubborn buttons, because broken fasteners can make reassembly harder. Take your time and support the fabric around each button.
Next, check for Velcro flaps at the front of the basket. Detach those flaps before you lift the basket away.
Once you release all buttons and flaps, the shopping basket should lift off easily.
Preparing for Washing
Before you wash stroller fabric, gather your tools and read the care label. A few minutes of prep can prevent stains from setting, fabric from fading, and parts from getting lost.
Remove loose crumbs with a handheld vacuum or soft brush. Then treat stains before you place fabric in water.
Gather Necessary Tools
Gathering the right tools helps you remove stroller fabric without damaging clips, pegs, or straps.
Keep these items nearby before you begin:
- A small pointed tool for releasing side strut pegs
- A flathead screwdriver for stubborn shopping basket buttons
- A soft cloth for wiping the stroller frame
- A gentle detergent for washable fabric parts
- A small container for screws, clips, or loose fasteners
Set each removed part in one place so you can find it during reassembly.
Check Fabric Care Instructions
Read the care label before you wash any stroller fabric. Each fabric type can need a different wash method or water temperature.
Some fabrics can handle a gentle machine cycle. Others need hand washing or spot cleaning only.
| Fabric Type | Washing Method |
|---|---|
| Cotton | Machine wash on a gentle cycle if the label allows it |
| Polyester | Machine wash in cold water if the label allows it |
| Canvas | Hand wash or spot clean |
| Nylon | Machine wash on a delicate cycle if the label allows it |
| Microfiber | Machine wash in cold water if the label allows it |
Remove detachable boards, clips, and accessories before washing any fabric piece.
Remove Accessories First
Remove accessories before washing so they don’t snag the fabric or damage the washer.
Start with the canopy, then detach the shopping basket and side struts. Release each button, strap, and peg before you pull the fabric free.
Check these accessory types during removal:
- Canopy
- Shopping basket
- Side struts
- Harness pads
- Removable inserts
Place small accessories in a labeled bag so they don’t get lost.
Before You Begin
Plan for about 20 to 40 minutes to remove most stroller fabrics. Add more time if your stroller has several buttons, struts, or built-in boards.
Work on a clean floor or table with good light. Take photos before each step so you can match every strap and fastener during reassembly.
Pro tip: Take a quick photo of every strap and buckle before removal so reassembly feels much easier.
Step-by-Step Fabric Removal
Use this order when you want a simple way to remove stroller fabric for cleaning.
- Remove the canopy. Pull the canopy away from the chassis clips on both sides.
- Release the side struts. Press each circular peg and pull the strut away from the frame.
- Detach the seat straps. Unhook the elastic straps and unbutton the side straps.
- Lift the seat textile. Pull the fabric over the adjustment button and remove it from the seat.
- Check for hard boards. Remove loose boards before washing, or spot clean fixed boards.
- Remove the shopping basket. Release each button and Velcro flap before lifting the basket off.
Keep every part in order as you remove it. This habit helps you avoid missed clips when you rebuild the stroller.
Washing and Drying Stroller Fabric
Wash stroller fabric only after you check the care label. Use cold water and a gentle detergent when machine washing is allowed.
Skip bleach, harsh stain removers, and high heat unless the care label specifically allows them. Strong cleaners can weaken fabric, fade color, or damage padding.
Air dry the fabric in a shaded, well-ventilated area. Reattach each piece only after it dries fully, because trapped moisture can cause odors.
Common Mistakes to Avoid
Small mistakes can stretch straps, crack clips, or make the seat fit poorly after washing.
- Don’t pull fabric before you release every strap, button, and peg.
- Don’t machine wash fabric with hard boards still inside unless the label allows it.
- Don’t dry stroller fabric with high heat, because heat can shrink or warp some materials.
- Don’t reassemble the stroller while fabric still feels damp.
- Don’t skip the manual when a clip or strut resists removal.
These checks help you protect the stroller and keep the seat secure for your child.
Reassembling the Stroller
Before you reassemble the stroller, confirm that every fabric piece feels fully dry. Damp fabric can trap odors and make the seat uncomfortable.
Start by aligning the back strut with its slot on the chassis. Press the circular peg on each side strut, then push it into the adjustment mechanism until it clicks.
Reattach the canopy by lining it up with the chassis clips. Push down until each side locks in place.
Next, reinstall the seat textiles. Thread the elastic straps through the pegs and button the side straps back onto the seat.
Attach the shopping basket last. Check that every button and Velcro flap sits tight before you use the stroller.
Frequently Asked Questions
Can I Machine Wash Stroller Fabric, and at What Temperature?
You can machine wash some stroller fabric, but you need to check the care label first. Use cold water and a gentle cycle when the label allows machine washing.
How Often Should I Clean My Stroller Fabric?
Clean spills and sticky spots as soon as you notice them. For regular upkeep, wipe high-touch areas weekly and deep clean the fabric when it looks dirty or smells stale.
What if the Fabric Is Stained or Has Odors?
Treat stains before washing with a gentle fabric-safe cleaner. For odors, sprinkle baking soda on dry fabric, let it sit, then vacuum it before washing or spot cleaning.
Are There Specific Detergents Recommended for Stroller Fabric?
Choose a mild detergent without dyes or strong fragrance when possible. Avoid bleach and harsh cleaners unless the care label says they are safe.
How Do I Prevent Fabric From Fading During Washing?
Wash stroller fabric in cold water and use a gentle detergent. Air dry it in the shade instead of leaving it in direct sun for a long time.
Can I Use the Stroller Right After Washing the Fabric?
Use the stroller only after every fabric piece dries fully and locks back into place. Check the harness, seat straps, canopy clips, and basket fasteners before placing your child in the stroller.
Final Check Before You Use the Stroller
Clean stroller fabric makes daily rides more comfortable, but safe reassembly matters most. Before your next outing, check every strap, clip, peg, button, and Velcro flap.
Give the seat a gentle tug to confirm the textiles sit securely. Once everything feels firm and dry, your stroller is ready for the next trip.
References
- Canopy removal image — Selly Sell
- Side strut removal image — Selly Sell
- Seat textile removal image — Selly Sell